Introduction
This guide will walk you step-by-step through connecting your Asana account to IAWGF using OAuth 2.0. Once authorized, you’ll be able to configure feeds and send tasks directly to Asana.
Tip: You’ll also get step-by-step guidance inside the plugin as you go—the interface walks you through each part of the connection.
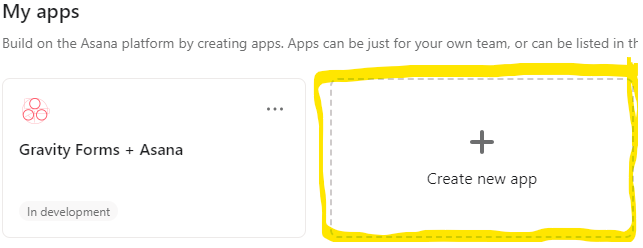
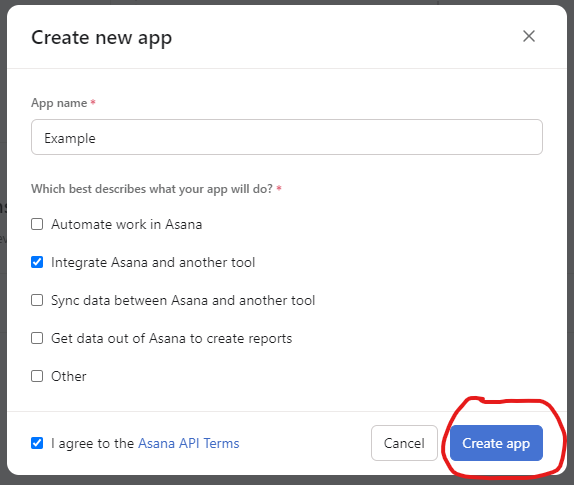
Step 1: Create an Asana App #
- Go to your Asana My Apps page.
- Click Create new app, name it (e.g., “Gravity Forms Integration”), and select Integrate Asana and another tool.
- Accept the Asana API Terms, then click Create app.
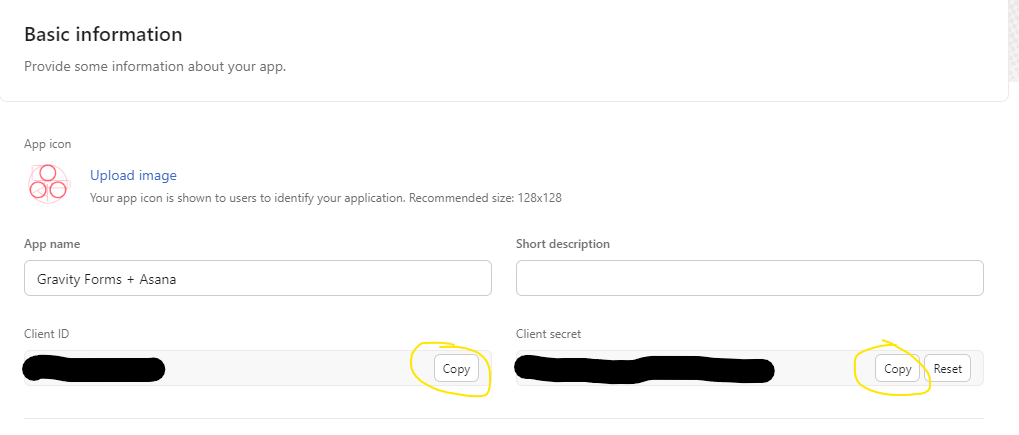
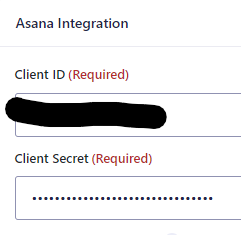
Step 2: Enter App Credentials in the Plugin #
- In your Asana app’s settings, go to the Basic information tab.
- Copy the Client ID and Client Secret.
- In WordPress, navigate to GravityOps → Asana Integration → Settings (or Forms → Settings → Asana Integration).
- Paste the Client ID and Client Secret into the respective fields.
- Click Save.
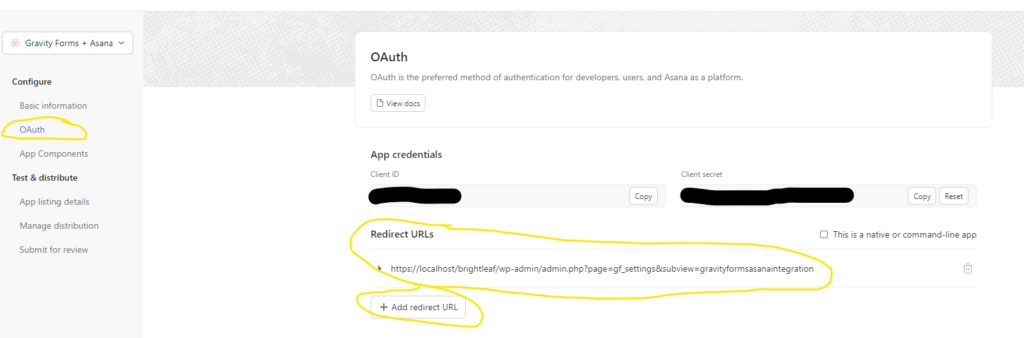
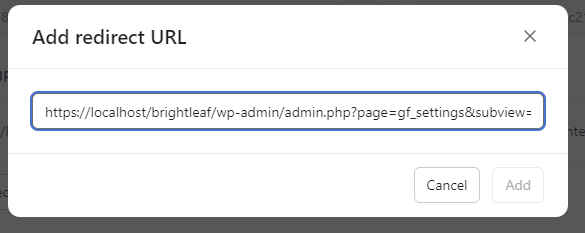
Step 3: Configure OAuth in Asana #
- In your Asana app’s settings, open the OAuth tab.
- Add the plugin’s Redirect URL (from the plugin settings) under Authorized Redirect URIs—omit the
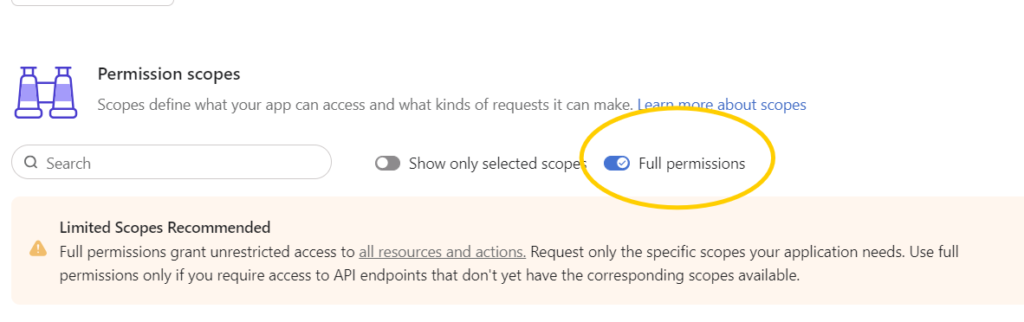
&step=3suffix if present. - When asked, choose Full permissions for now. Note: Asana is moving to a scoped permissions model where you will need to select specific scopes for both new and existing integrations. See more details here.
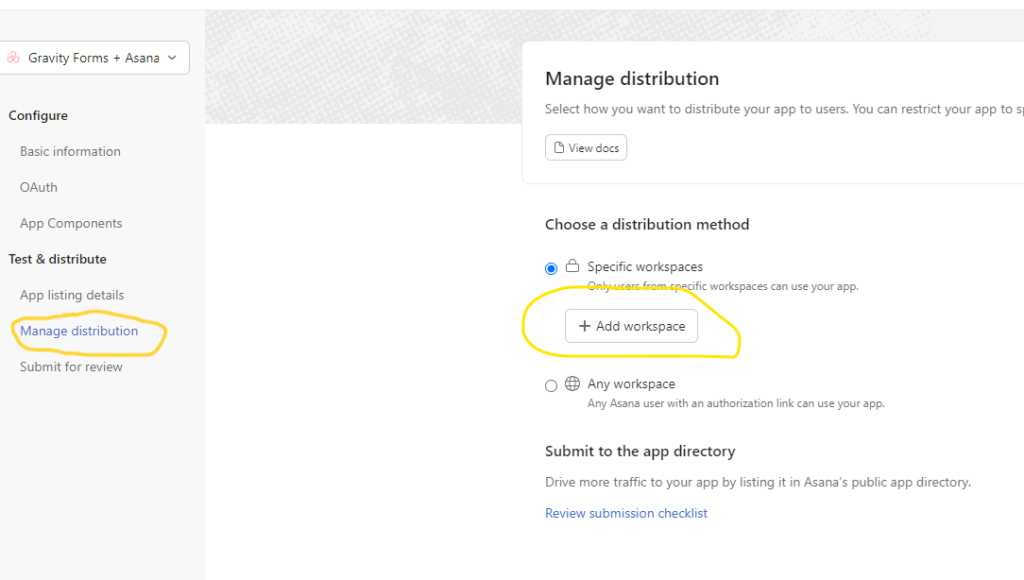
- Under the Manage distribution tab, add the workspace(s) you want the plugin to have access to.
Step 4: Authorize the Plugin #
- In WordPress, go to Step 4 of the plugin settings.
- Click Authorize—you’ll be redirected to Asana’s authorization screen.
- Log in if prompted, and approve access. Remember to log in as a user with necessary permissions.
- Upon success, the plugin will display a confirmation message and greet you.

For a deeper dive into how OAuth works, including the authorization code flow, token exchange, and specific scopes used by the plugin, see the “Explanations & Concepts” section.


